A Stitcher’s Dictionary: Table of Contents

A Stitcher's Dictionary: Table of Contents

A Stitcher’s Dictionary: Table of Contents

Each week on Little Thread Crafts I do a Term of the Week dictionary article, where I pick a common word or phrase among cross-stitchers and explain its meaning. Here they are, all collected, as a Stitcher’s Dictionary!

Below you will find an alphabetized list of every term I’ve done so far. Think of it like a cross-stitcher’s dictionary, and this is the table of contents.

Click the word to read the article. Happy Stitching!

» Read more

How To: Make A French Knot

Make A French Knot

Hello everyone, and welcome to Tutorial Tuesday!

French Knots are notorious among the cross-stitch community. For some reason, people just can’t seem to get them right! Some have abandoned them completely for other knots or seed beads, while others, like me, have never had an issue with them. It seems like you can do them, or you can’t. Today, I’m going to show you how I do them in four easy steps!

Full disclosure: this is how I do French Knots. This may not be the proper way or the right way, and it may not work for you. This is just what works best for me! Your success may vary.

My supplies for this tutorial!

My supplies for this tutorial!

Materials Used For This Demonstration:


  • 14 Ct. White Aida Fabric
  • 1 strand of DMC 310 Black cotton thread
  • Size 24 Tapestry Needle

Before We Start:

Your first step with making a french knot should be to thread your needle and start your thread however you would normally start it. If you’re struggling I recommend starting with a waste knot, which is what I’m going to start with today. (I double-knotted it in the picture to make sure I wouldn’t pull it through the hole.)

The needle is threaded and ready to go.

The needle is threaded and ready to go.

Now that you’ve got your needle and thread ready to go, we can look to the fabric. Let’s say you need to put a french knot on the edge of this square right here:

Our starting point.

Our starting point.

I’m showing you this spot because this is one of the most difficult places to make a French Knot. Corners are hard because you’re meant to come up and then go back down through the same hole. This is also difficult because there are no other stitches around it; usually the French Knots go on top of the cross-stitch, so they’re easier to anchor. If you can master this spot, you can put French Knots anywhere!

Step One:

Step One is easy: come up with your needle and thread through the designated hole.

Step One: Come up through the fabric.

Step One: Come up through the fabric.

Step Two:

Now, Step Two will require both hands. Take your needle in one hand, and with your other hand pull the thread coming up out of the fabric taunt:

Step Two: First pull your thread taunt with one hand.

Step Two: First pull your thread taunt with one hand.

Now, take your needle and wrap the thread around your it twice. You can wrap it once, you can wrap it five times; the number of wraps determines how thick your knot is. I like to wrap it twice.

Step Two Cont: Then wrap your needle twice with the thread.

Step Two Cont: Then wrap your needle twice with the thread.

This bit is optional, but what I do is wrap the thread as close to the end of the needle as I can without it slipping off the end, and I pull the loops as tightly as I can against the needle. This is so I don’t have to worry about the loops coming loose when I’m pulling the needle through the fabric, and so the knot is a little neater when finished.

Step Three:

(I don’t have very clear pictures of this step; they were very hard to take! I had to set a timer on the camera and everything.)

You’re already halfway there to making a French Knot. Now, put your needle to the fabric as if you were going to go back through the hole, but don’t. Instead, take your needle and move up (or down) one thread on the Aida fabric and poke your needle through that strand. Do NOT go through the original hole! Like this:

Step Three: Poke hole in fabric with needle like shown.

Step Three: Poke hole in fabric with needle like shown.

(I actually went two threads down instead of one in the picture. It will show a little bit of black thread when you’re finished if you do this. It’s fine to do if there are crosses around it as you would never see the extra black thread.)

Poking a new hole between the threads will require a little bit of fiddling on Aida fabric, but just keep separating and pushing with your needle until you get it. Once you have it, push in with your needle far enough that you can grab it from the other side, but not all the way.

Step Four:

If you’ve followed all the instructions so far, your needle and thread should look something like this:

What your needle and thread should look like by now.

What your needle and thread should look like by now.

Now… pull your needle through! You can do as I do in the picture and hold the thread with your thumb as you’re pulling so the knot comes out a little neater. But pull until you can’t hold the thread anymore and then pull more some more until the loops are secure against the fabric. But don’t pull too hard! If you pull it too taunt it may actually pull the knot through the fabric and you’ll have to start all over. French Knots are supposed to sit loosely against the fabric like this.

And voila! You have a French Knot!

Ta-Da! A French Knot!

Ta-Da! A French Knot!

Now that your French Knot is done, you can go and make many French Knots all across the fabric!

Tell me your story: how successful are you with French Knots? Are they easy, are they hard? Do you like them? Do you hate them? Leave a comment and let me know! And let me know whether this tutorial helped you at all! 🙂

Salvaged Stash: My Mother’s UFOs

Welcome to the next Salvaged Stash article!

My mother taught me how to cross-stitch. When she was in her teens up through her early twenties when I was born, she used to stitch quite frequently. She taught me when I was eight years old, but it wasn’t until I was in my late teens that I realized just how many finished pieces adorned the walls of my childhood home. I suddenly realized the pictures I looked at every day for years were actually delicately worked with needle and thread, and I didn’t even notice.

When I was seventeen, I began to really get into cross-stitch on a more serious level. I built up my stash, bought more projects, designated a little craft area in my room… cross-stitch expanded beyond a hobby into a serious passion of mine. I talked to her about her stitching: did she still have anything left from back then? My mother went into her closet and pulled out an old bowling bag she hadn’t touched in years and gave it to me. That brown bowling bag and a flat tan box underneath it were all that remained from her years of stitching.

I expected to find needles, thread, old fabric, maybe a handful of old booklets and magazines that I knew she had. Imagine my surprise to find at least a dozen half-started projects! Some of them were only just started, some of them were half-finished, and one specifically was so close to being finished it must have only had around 50 stitches to go with all the backstitch already finished.

A handful of my mother's UFOs.

A handful of my mother’s UFOs.

Back then I was shocked to see them all, but now I can think on it and laugh. I’ve got a whole box full of projects I started and put down, way more than I found in Mom’s bowling bag. I do plan on finishing them all eventually, and I’m sure she had the same intention. She put the needle down to have kids and raise a family and the projects got lost in the whirlwind of life.

Unlike projects one may find in a thrift store or in a bundle of other things, my mother kept all her work mostly together. I’ve been able to find their charts in booklets or magazines, and have put the projects away in my binder for consideration. Maybe I’ll finish a few of the nearly completed ones and give them to her as gifts. There are a few charts she marked down as ones she would like to do but they were never started. Some projects had stains on the fabric that I could try to get out and clean up and finish for her.

I’ve completed one of those projects so far. The piece “Met My Dad?” was so close to being finished, I sat down one day and finished it for her. I washed it, got out the stains and the wrinkles as best I could, and then framed it for her. This is how it looked before the ironing and the framing:

Here it is, just completed!

Here it is, just completed!

I later wrote a Friday Finishes on it, which explains the piece in more detail: Friday Finishes #21: Met My Dad?

I sometimes wonder what would have happened had my mother not kept any of these things when she decided to give up cross-stitch. The half-started pieces probably would have been thrown away if their charts weren’t paired with them. I’m glad she kept them. These pieces in particular hold more sentimental value for the fact that they are my mother’s projects. Projects that have crossed more than twenty years to come to me to finish and hang them up on the wall. There’s something magical in that. Two generations worked on this project.

Much better than ending up in some landfill somewhere, don’t you think?

——————————————————————————-

Salvaged Stash is a series focused on rescued finishes and the story of how I received them. A lot of people don’t realize what happens to a lot of the treasured finished pieces once their makers have passed or the gift is given away or forgotten. I want to share my stories of the stash I’ve rescued and how I’ve used them. A companion series to the article Save the Stash from the Trash!

The Rules of Cross-Stitch

RCart20

Everyone has their own ‘rules’ when it comes to cross-stitch. It stems from the fact that more often than not, the community is almost wholly self-taught. When you first start out, the guides and the instructions only tell you the technique you need to learn: come up, come down, make an ‘x’. They don’t tell you how to do it, just that however you make an ‘x’ with needle and thread, that’s considered a cross-stitch.

For a beginner entering the cross-stitch community, the sudden amount of ‘rules’ can overwhelm. Backs must be neat, no carrying your thread, no waste knots, stitches must be consistent, work from the center, work from the corner, backstitch last, borders first, etc. etc.. The thing is, everyone will tell you a different set of rules based on what works for them.

The truth of the matter: cross-stitch HAS no rules. None. Despite what others may say about the craft, the ONLY rule of cross-stitch is that your threads must come together to make an ‘x’, because otherwise it’s not cross-stitch. That’s it. If you can make an ‘x’ on fabric, you can cross-stitch, and the personal method you use to create that ‘x’ can be whatever your heart desires.

I’m here to tell beginner stitchers that these so-called ‘rules’ are more like guidelines, created from thousands of years of stitchers figuring out what works best for them. (Yes, thousands of years – cross-stitch is considered one of the oldest forms of embroidery on the planet.) The personal guidelines for one stitcher may not work for another, who has developed their own methods and preferences when it comes to stitching.

As for me, my only ‘rule’ is this: all stitches must go in the same direction. If I start my piece with the bottom stitch / and the top stitch \, then all my stitches must go /\. To me, the finished piece looks cleaner and more uniform that way. This is an extremely common ‘rule’ that stitchers will tell others because it works and looks the best for the majority of the stitching community. Still, if you don’t like to have your stitches going the same way, you don’t have to do it.

I also railroad every cross-stitch, and I can tell you for a fact that that’s not a rule many others follow. Does it work for me? Yes. Does it work for others? Not always. (Don’t know what railroading is? See HERE.)

So don’t be overwhelmed when it comes to the ‘rules’ of the craft. There are no rules. You can pick and choose between thousands of years of work and pick whatever techniques and methods work best for you. Each finished piece is wholly unique to the individual who stitched it, and even if two stitchers followed the exact same guidelines their finished products wouldn’t look exactly the same. That is the beauty of the craft.

—————————————————————————————————–

“Random Corner” is a place for all articles related to all manners of cross-stitchery and the cross-stitch community that don’t fall into the topics covered in the regular segments. There is no set schedule for Random Corner articles, they’re just random!

By the way – to keep up on Little Thread Crafts stitching news and get pictures, updates, and more that don’t appear on the blog until much later, follow me on Facebook, Twitter, and Instagram! I would greatly appreciate it!

Term of the Week: Railroading

TofW12

This week’s Term of the Week is a tactic I personally use with all of my stitching! Maybe you will too after learning the term.

The word “railroading” stands for the act of making your stitches lie flat against the fabric. There are different ways to do this – I believe they use the same word in needlepoint and it does something a little bit different than what it does for cross-stitch.

For cross-stitching specifically, to “railroad” your stitches means to place your needle between your two strands of thread before pulling it through the fabric. This forces the stitches to lie flatter on the fabric, rather than bunch up one on top of the other. I’ve found it also keeps the thread from tangling as easily because it also forces the thread to straighten as it is being pulled through the fabric.

You can railroad with any type of thread and as many strands as you are using to stitch – I’ve done railroading with three strands where I alternated two threads on the left, one thread on the right. Same goes for five strands!

A close up of how to railroad two strand stitches.

A close up of how to railroad two strand stitches.

Above is an example of how I railroad. I pull the thread in the direction that I’m doing the cross. Then, I put my needle in between the two strands, and pull through the fabric. As you can see in the second picture, the stitch is lying flat on the fabric, with the two strands side by side, rather than bunched together, or one under the other, or turned about.

While no one is required to railroad while they’re stitching, many stitchers consider it high on the list of “stitching etiquette”, along with having the crosses all going in the same direction.

Why is is called railroading, you ask? The two strands resemble the rails of a railroad – straight, one next to the other, for as far as the eye can see! Like when you put your needle between the two strands, and when the thread lies flat on the fabric.

——————————————————————————

“Term of the Week” is a weekly blog post highlighting a new word or phrase commonly used among cross-stitchers but not found in an ordinary dictionary. These posts are to help explain the words’ meanings in context and provide a resource for anyone wondering what a term like “frogging” means. Check back every Thursday!

Save the Stash from the Trash!

RCart3

Imagine what will happen to your stash once you’re gone. Maybe you’ll be blessed enough to have other stitchers in the family who will take it and maybe finish all those UFOs and WIPs you have lying around. Or maybe you’ll have it set up so your stash will be donated somewhere or otherwise given away to other stitchers you know or to a good cause.

But imagine what happens to the stash for the families of those who have no other crafty people. What will happen to the stash then? The unfinished pieces will probably get thrown away because someone won’t see value in something that isn’t done. Maybe they’ll try to sell the unopened packages of fabric or needles or thread – but it might also be too overwhelming, considering the gigantic size of most stashes. The best option – and the one most families will go with – will be to take all the stash into a local charity or thrift store to let someone else try to sell it all.

As someone who owns a thrift store, has worked in some, and regularly shops at them, I can’t begin to tell you how much amazing cross-stitch stuff I’ve found in thrift stores. I know in a lot of countries DMC thread isn’t cheap, but at my local Joann’s you can get a skein for $0.39 USD (last I checked). Sometime they run sales 3 for $1 or 4 for $1. Well I went to the Goodwill down the street from campus and randomly came across an entire bin full of BOXES of DMC thread in yellow and green. There were 12 skeins to a box and most of the boxes were in good condition with all the skeins inside, and guess how much they were? $1 each. That is $0.08 per skein! Better than any deal you could possibly get in a retail store. Unfortunately they only had two colors but I’ll never run out of yellow and green for that price.

Right above this bin of DMC thread boxes there were unopened packages of needles for less than $0.60 USD. I always just use the free needles that come with kits so I don’t know if they were a certain kind but it was a great price. There were some quilting patterns, yarn, and hoops in the same area as well.

Next door to the Goodwill by campus is Community Thrift Store, which is a smaller building but tends to have stuff Goodwill does not. The wooden embroidery square frames in the stores can run upwards of $50 USD and I found one there (missing one screw) for $4. There was a very pretty unfinished yarn project on it as well I got for free. I also found an unopened cookie jar cross-stitch kit, a hand framed finished piece I’m sure someone made with a lot of love, and several packages of fabric and some more hoops.

There is another store called Yesterdays Memories pretty close to my house that I decided to go in and browse one day. The woman working was very nice and happened to be a stitcher herself! She had bad eyesight and couldn’t see well enough to do it anymore, but offered to bring a whole load of stuff down for me to look at because she was otherwise just going to end up giving it away or throwing it all out.

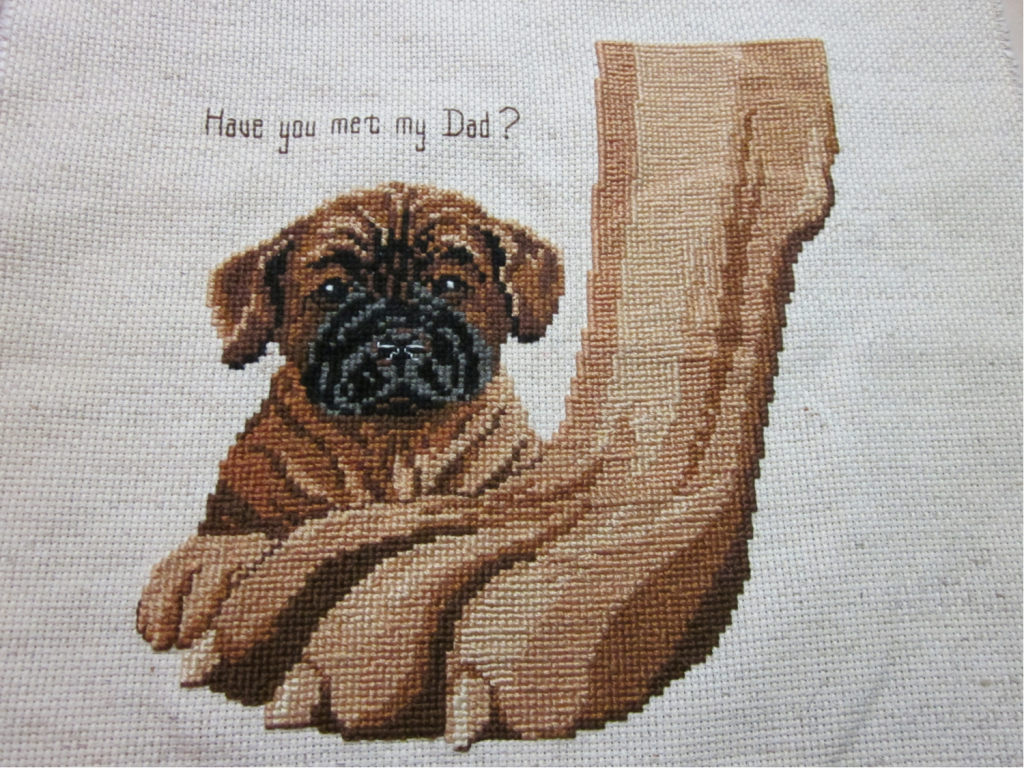
After we chatted I walked around and found several very cool unopened packages of fabric (two of them were checkered in multiple colors) an old sewing table, a sewing box (I didn’t end up getting either because I didn’t have enough money on me at the time), several wooden and metal hoops, several handmade felt pincushions in 3 different colors (I so wanted one but again, was running low on money), a cross-stitched table runner that was a small hole in one of the corners the owner was going to throw out, several opened kits that still had all the stuff with them, and a Paula Vaughan finished piece called “Something Old, Something New” that had been professionally framed and had been donated by someone who otherwise would’ve just thrown it out because they had no use for it. I mean this piece is enormous, would have taken me several years to finish, was framed professionally, and the original owner was about to throw it out. Well I rescued it, and it’s currently hanging on my wall above my bed.

Paula Vaughan's Something Old, Something New that I rescued from the trash

Paula Vaughan’s Something Old, Something New that I rescued from the trash

I’ve gotten several donations to my own thrift store as well. A child of a woman who passed came by and brought almost all of the woman’s Christmas craft stuff for me to sell. It wasn’t just cross-stitch (although I found hoops and several dated Christmas ornaments) but handmade cloth wreaths, wooden ornaments and decorations, ribbons and bows and all kinds of things. I have a few finished pieces that a woman said was given to her by her grandmother after her grandmother passed but she didn’t want them. I have really cool looking needlework tapestries (they were manufactured in Belgium, but they still look cool!). I have a large amount of chart books for cross-stitch, needlepoint, and embroidery, along with thread and hoops. All donation stuff.

I’ve been seeing a lot of discussion in my Facebook groups about the New Year and how people want to stop buying new charts, fabric, etc., because their stashes are so large. Not that I disagree, I believe in using what you have before getting something new, but I also have an opinion on buying stash. If it’s possible, find a thrift store near you and buy any stash stuff you find from there! Because it is unbelievable how much good, gently used or even unopened stitching supplies can be found because people give them away. And guess what happens if nobody buys it? It ends up in the trash! And especially if you find finished pieces, buy them. Save them. You know how many hours we stitchers put into our pieces, sometimes thousands of hours, but people who don’t understand will literally want to toss them out thinking they’re worthless. The piece I have above my bed was probably worth thousands of dollars to the person who made it and I got it for less than $15.

Buying from the retail chains and your local needlework shops and your online stores are very important – after all, buying charts or kits or fabric shows the commercial industry that there is a market in cross-stitch and people will buy if you have something to sell. That why Wal-Mart recently brought back its stitching section for the first time in years (I know because when I first got back into cross-stitch I couldn’t find anything anywhere until I went to Joann’s). But when I know, and have personal experience, that there is a lot of beautiful and gently used stash items and unfinished and finished pieces lying around in thrift stores or charities that are going to be thrown away if people don’t buy them, I get very upset knowing it’s all going to go to waste.

Please, if the option is available to you, save the stash from the trash! Don’t let non-stitchers and anyone else who doesn’t understand what we do just toss away those things that are so precious to us! Shop at thrifts stores or charities, go to estate sales and garage sales, look for stash where you can find it, and save it! It is always cheaper than what you can get from big chain stores like Joann’s and Michael’s and DMC. And think of the fact that some of it might not even be in production anymore! That nice package of aida fabric you found might have come from a company that went out of business 20 years ago. Or that kit is extremely rare because it’s completely out of production. You might never find another thing like it again, and if you don’t buy it, no one else will be able to see it either because it’ll get thrown away.

Save the stash from the trash!

——————————————————————————-

“Random Corner” is a place for all articles related to all manners of cross-stitchery and the cross-stitch community that don’t fall into the topics covered in the regular weekly schedule. There is no set schedule for Random Corner articles, they’re just random!